A microwave is one of the most convenient appliances in a modern kitchen. It helps you reheat leftovers, defrost frozen food, warm drinks, and prepare quick meals in just a few minutes. However, regular use can leave behind food splashes, grease, unpleasant smells, and stubborn stains. If these problems are ignored, they can affect your microwave’s cleanliness, performance, and long-term condition.
The good news is that cleaning your microwave does not require expensive products or complicated techniques. With a few simple household supplies and the right approach, you can keep the appliance clean while reducing the risk of avoidable damage.
For homeowners in Saskatoon, regular microwave maintenance is especially useful during busy household routines when the appliance may be used several times a day. A clean microwave is easier to maintain, more pleasant to use, and less likely to develop problems caused by neglected spills and residue.
This guide explains how to clean your microwave safely, which products to avoid, how often to clean different parts, and which warning signs may indicate that professional attention is needed.
Why Is Regular Microwave Cleaning Important?
Cleaning your microwave is about more than keeping it looking good. Food residue, grease, and moisture can accumulate inside the appliance and cause several problems.
1. It helps prevent stubborn food buildup
When food splashes onto the interior walls, repeated heating can make the residue harder to remove. Over time, dried food and grease may become difficult to clean with ordinary wiping.
Removing spills soon after they occur makes cleaning easier and reduces the need for aggressive scrubbing.
2. It helps reduce unpleasant odours
Food particles can produce lingering smells, especially after heating strongly flavoured foods. Regular cleaning removes the residue responsible for many of these odours.
3. It reduces the risk of food-related sparking
Certain food residues, damaged interior surfaces, and contaminated waveguide covers can contribute to sparking or arcing. Cleaning can help remove some preventable causes, although it cannot correct damaged components or worn surfaces.
If your microwave sparks repeatedly after you have removed obvious food residue and metal objects, stop using it and arrange an inspection.
4. It supports better everyday maintenance
A clean cooking cavity makes it easier to notice changes such as chipped interior coatings, damaged door seals, or unusual marks. Identifying visible problems early can help you decide when the appliance needs professional attention.
Cleaning cannot prevent every mechanical or electrical fault, but it is an important part of responsible appliance care.
What You Need to Clean Your Microwave
Before you begin, gather a few simple supplies. You generally do not need a specialist microwave cleaner for routine maintenance.
Useful items include:
- A microwave-safe bowl.
- Clean water.
- A soft microfibre cloth or sponge.
- Mild dishwashing liquid.
- A soft, non-abrasive cleaning cloth.
- A clean towel for drying.
- A small amount of white vinegar, if appropriate for your appliance’s cleaning instructions.
Avoid steel wool, abrasive scouring pads, harsh chemical cleaners, and sharp tools. These can damage interior surfaces or leave scratches that make future cleaning more difficult.
Always check your microwave’s user manual before using a particular cleaning solution. Manufacturers may provide specific instructions for the interior coating, turntable, and other components.
Step-by-Step Guide to Cleaning Your Microwave
Following a consistent cleaning routine helps remove food residue without exposing the appliance to unnecessary moisture or harsh treatment.
Step 1: Switch Off the Microwave
Before cleaning, stop the appliance and allow it to cool if it has been used recently.
For routine interior cleaning, disconnect the microwave from the power supply if you can safely reach the plug. Keep your hands dry and avoid touching the plug if there is any sign of electrical damage or moisture around the outlet.
Never clean the appliance while it is operating.
You should also avoid opening the microwave cabinet. The internal electrical components can present a serious shock hazard, even after the appliance has been unplugged.
Step 2: Remove the Turntable and Roller Ring
Many microwaves have a removable glass turntable and a roller ring beneath it.
Carefully lift out the turntable according to the manufacturer’s instructions. Remove the roller ring if it is designed to be taken out.
Wash these parts using warm water and mild dishwashing liquid. A soft sponge can help remove grease and food residue without scratching the glass.
Rinse thoroughly and dry the components before reinstalling them.
Check the user manual to determine whether the turntable is dishwasher-safe. Avoid sudden temperature changes that could cause hot glass to crack.
Step 3: Loosen Dried Food with Steam
Steam is one of the easiest ways to soften stubborn food splashes.
Follow these steps:
- Pour water into a microwave-safe bowl.
- Place the bowl securely inside the cooking cavity.
- Heat it according to the manufacturer’s instructions until steam forms.
- Switch off the microwave and allow the bowl and interior to cool sufficiently.
- Carefully remove the bowl using appropriate protection if it is hot.
- Wipe the softened residue away with a soft cloth.
Water heated in a microwave can become superheated and erupt unexpectedly when disturbed. Use a suitable container, avoid overheating the water, and handle the bowl carefully.
Do not place your face close to the open microwave when removing the bowl.
For especially stubborn stains, repeat the process if necessary rather than scrubbing aggressively.
Step 4: Clean the Interior Walls
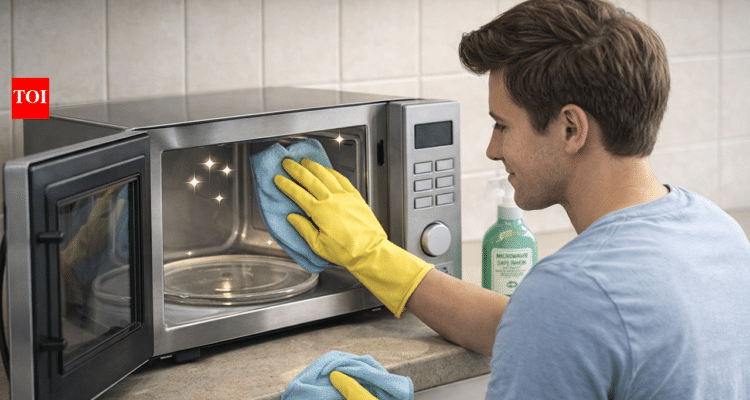
Once the residue has softened, wipe the ceiling, side walls, floor, and inside of the door with a damp, soft cloth.
For greasy areas, use a small amount of mild dishwashing liquid diluted in water, provided the manufacturer’s instructions permit it.
Pay attention to corners where food splashes often collect.
Do not pour water directly into the cooking cavity. Instead, apply cleaning solution to the cloth and use it to wipe the surfaces.
Avoid soaking ventilation openings, electrical areas, or the waveguide cover. Never scrape stubborn food with a knife or metal utensil.
If a stain will not come away easily, soften it again with steam instead of applying excessive force.
Step 5: Clean the Door and Door Seals
The microwave door needs special care because its condition is important for safe operation.
Use a soft, damp cloth to clean the inside of the door, the surrounding frame, and accessible sealing surfaces. Remove grease and food particles without pressing too hard.
Do not use abrasive cleaners or sharp tools around the door edges.
Inspect the door for visible cracks, bent areas, damaged hinges, or a latch that does not work correctly.
If the door does not close securely or appears damaged, stop using the microwave and seek professional advice. Cleaning cannot repair a defective door or restore a damaged safety mechanism.
Step 6: Clean the Exterior
Dust, fingerprints, and cooking grease can accumulate on the outside of the microwave.
Wipe the top, sides, front, and handle with a soft cloth lightly dampened with an appropriate cleaning solution.
For the control panel, use only the cleaning method recommended by the manufacturer. Avoid spraying liquid directly onto buttons, touch controls, display openings, or ventilation slots.
Too much moisture can enter the control area and cause operational problems.
Dry the exterior with a clean cloth after wiping it.
If the microwave is installed above a stove, check the manufacturer’s instructions for dealing with grease that may collect around its exterior and ventilation areas.
Step 7: Dry and Reassemble the Components
After cleaning, wipe the interior dry with a clean cloth and allow any remaining moisture to evaporate.
Make sure the turntable and roller ring are completely dry before putting them back in place.
Position the turntable correctly so that it sits securely on its support. Incorrect placement can cause uneven rotation or unusual noise.
Once everything is dry and properly assembled, reconnect the appliance if it was unplugged and the plug and outlet are dry and undamaged.
If you notice a burning smell, sparks, or electrical problems during subsequent use, stop operating the microwave and arrange an inspection.
How to Remove Common Microwave Stains and Smells
Different types of residue may require slightly different cleaning methods.
Grease stains
Grease often collects after heating foods that contain oil or fat.
Use warm water and mild dishwashing liquid on a soft cloth. Allow the solution to loosen the residue, then wipe it away and remove any remaining soap with a clean, damp cloth.
Avoid abrasive pads that could damage the interior coating.
Burnt food marks
Burnt food can stick firmly to the cooking cavity.
Use steam to soften the residue before wiping. If the mark remains, repeat the process rather than scraping it with a sharp object.
If the interior coating is chipped, peeling, or visibly damaged, consult the manufacturer’s guidance before continuing to use the appliance.
Unpleasant odours
Lingering smells often come from food particles and grease.
Clean the interior, turntable, and door surfaces thoroughly. Once everything is clean and dry, leave the door open briefly to allow the cavity to air out, provided the appliance is not in use and the area is safe.
For persistent smells, check whether residue remains around accessible corners or under the turntable.
A burning electrical smell is different from an ordinary food odour. Stop using the microwave if you suspect an electrical problem.
Dried sauce and drink spills
Sauces, soups, and sugary drinks can leave sticky marks.
Soften the residue with steam or a damp cloth, then wipe it away gently. Clean spills as soon as the appliance has cooled to prevent them from becoming more difficult to remove.
Cleaning Mistakes That Can Damage Your Microwave
Even when your intentions are good, using the wrong cleaning method can damage the appliance.
Using abrasive cleaning tools
Steel wool, rough scouring pads, and sharp scrapers can scratch or damage interior surfaces. Choose soft cloths and non-abrasive sponges instead.
Spraying liquid directly into openings
Cleaning liquid can enter vents, control panels, or electrical areas if sprayed directly onto the appliance.
Apply suitable cleaning solutions to a cloth first and avoid excessive moisture.
Using harsh chemicals
Strong chemical cleaners, oven cleaners, and products not approved for microwave interiors may damage surfaces or leave unwanted residue.
Follow the manufacturer’s cleaning recommendations.
Ignoring the door and latch
Food residue can accumulate around the door and its surrounding frame. Clean accessible surfaces gently, but do not attempt to adjust hinges, repair latches, or modify safety interlocks yourself.
A damaged door requires professional assessment.
Running an empty microwave
Do not operate a microwave without an appropriate load unless the manufacturer explicitly permits the procedure. Running it empty can damage components in some designs.
If you want to test heating after cleaning, follow the instructions in the user manual.
How Often Should You Clean Your Microwave?
The ideal cleaning schedule depends on how often you use the appliance and what you heat in it.
After spills: Wipe up food splashes once the microwave has cooled enough for safe cleaning.
Weekly: Inspect the interior, clean the turntable, and wipe away grease and fingerprints.
Monthly: Give the interior, door surfaces, control area, and exterior a more thorough clean. Check ventilation openings for visible dust without inserting objects into them.
As needed: Clean immediately after a major spill or when food odours begin to linger.
Households that use their microwave several times each day may need to clean it more frequently. A simple cover designed for microwave use can help reduce splashes, provided it is used according to its instructions.
Regular cleaning is easier and safer than waiting until food residue becomes heavily baked onto the interior.
When Cleaning Is Not Enough
Cleaning can resolve many everyday problems caused by food residue, but it cannot fix every microwave malfunction.
You may need professional assistance if the appliance:
- Runs but does not heat food.
- Produces unexplained sparks after the cavity has been cleaned.
- Makes a new or unusually loud electrical noise.
- Repeatedly trips a circuit breaker.
- Shuts off unexpectedly.
- Produces smoke or an electrical burning smell.
- Has a damaged door, latch, or visible internal surface.
If you experience these problems, stop using the microwave when appropriate and do not open its cabinet to investigate internal components.
For homeowners who need help diagnosing persistent faults, professional Microwave repair Saskatoon services can help identify the underlying problem and explain the available options.
Cleaning the appliance regularly may reduce avoidable maintenance issues, but electrical or mechanical faults require a different approach.
Frequently Asked Questions
1. What is the safest way to clean a microwave?
Use a soft cloth, mild dishwashing liquid, and water. Steam can help loosen dried food residue. Follow the manufacturer’s instructions and avoid spraying liquid directly into vents or control openings.
2. Can I use vinegar to clean my microwave?
Vinegar diluted in water may help loosen residue and reduce some food odours. However, check the manufacturer’s guidance first, and avoid using cleaning solutions that could damage your appliance’s surfaces.
3. How often should I clean my microwave?
Wipe up spills after they occur, perform a basic cleaning weekly, and inspect the appliance more thoroughly each month. Clean it more frequently if you use it heavily.
4. Can dirty food residue cause microwave sparks?
Food residue may contribute to sparking in certain circumstances, particularly if the waveguide cover or interior surfaces are affected. However, sparks can have other causes. Stop using the microwave if sparking continues after obvious residue and metal objects have been removed.
5. Is it safe to use a sponge inside a microwave?
Yes, a soft, non-abrasive sponge is generally suitable for cleaning the cooking cavity. Avoid rough pads, steel wool, and sharp tools that may scratch or damage the interior.
6. How can I remove a burnt smell from my microwave?
Clean the interior, turntable, and accessible door surfaces to remove food residue and grease. If the smell is electrical, resembles burning plastic, or persists without an obvious food-related cause, stop using the appliance and arrange an inspection.
7. Can I spray cleaning liquid directly inside the microwave?
It is better to apply a suitable cleaning solution to a cloth rather than spraying it directly into the appliance. Excess liquid can enter ventilation openings, controls, or other areas where moisture may cause problems.
8. Should I unplug my microwave before cleaning it?
Switch off the appliance and allow it to cool. For routine cleaning, disconnect power if the plug can be reached safely and the plug and outlet are dry and undamaged. Never touch electrical connections with wet hands.
9. Can cleaning fix a microwave that does not heat food?
Cleaning may help if the problem relates to an obvious obstruction or food residue affecting operation, but a microwave that runs without heating may have an electrical or component fault. Professional diagnosis may be necessary.
10. Does regular cleaning make a microwave last longer?
Regular cleaning can reduce food buildup, help prevent persistent odours, and make visible damage easier to notice. It cannot prevent every component failure, but it is a useful part of routine appliance maintenance.
Final Thoughts
Cleaning your microwave regularly is a simple way to maintain a more hygienic kitchen and reduce problems caused by accumulated food residue and grease. Using steam, mild cleaning products, and soft cloths can help remove stubborn stains without damaging the appliance.
Pay particular attention to the door, turntable, and interior surfaces, and avoid excessive moisture, abrasive tools, and harsh chemicals. Most importantly, recognise the difference between a cleaning issue and a possible electrical fault.
If your microwave continues to spark, stops heating, produces an electrical burning smell, or develops unusual operating problems, do not assume that cleaning will solve it. Stop using the appliance when necessary and seek professional advice.
A consistent cleaning routine, combined with safe operation and prompt attention to warning signs, can help keep your microwave in good condition for everyday use.
You could also refine the article with